Get inspired with 20 Trendy Nail Designs you can DIY at home. Create stunning looks easily and impress with your nail art skills!
Nail art has become an essential part of self-expression, and with so many styles to choose from, anyone can find something that speaks to them. Whether you’re gearing up for a special occasion or just want to add a touch of flair to your everyday look, these trendy nail designs are perfect for a DIY session at home.
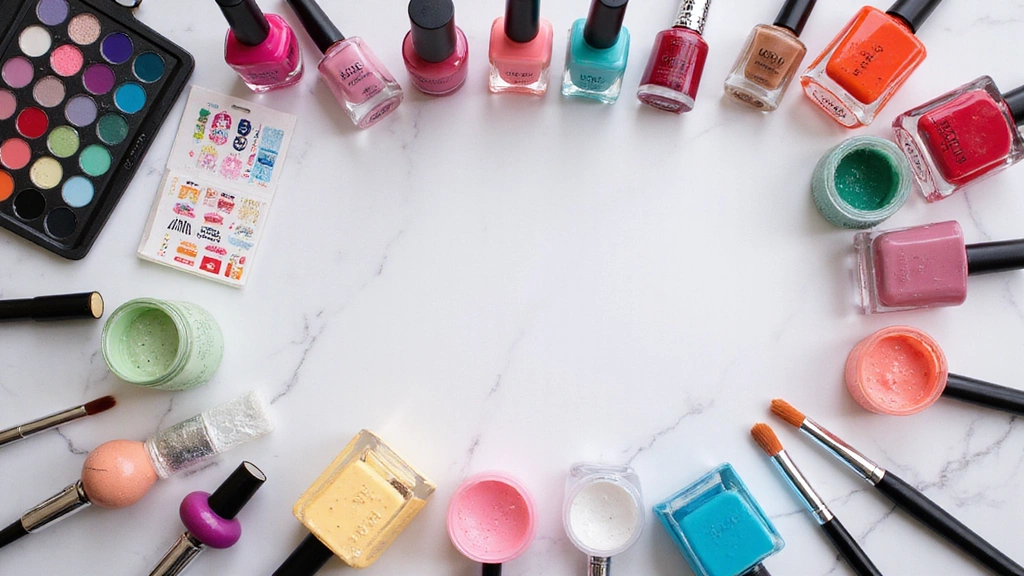
From minimalist lines to bold colors, there’s something for everyone! Get your nail polish, tools, and maybe a few friends, and let’s get artful! Each of the designs is not only easy to follow but also budget-friendly. You might just find your new favorite way to express yourself via your fingertips. Get ready to be inspired and don’t forget to make a mental note about that amazing design waiting for you at #14!
1. Ombre Magic
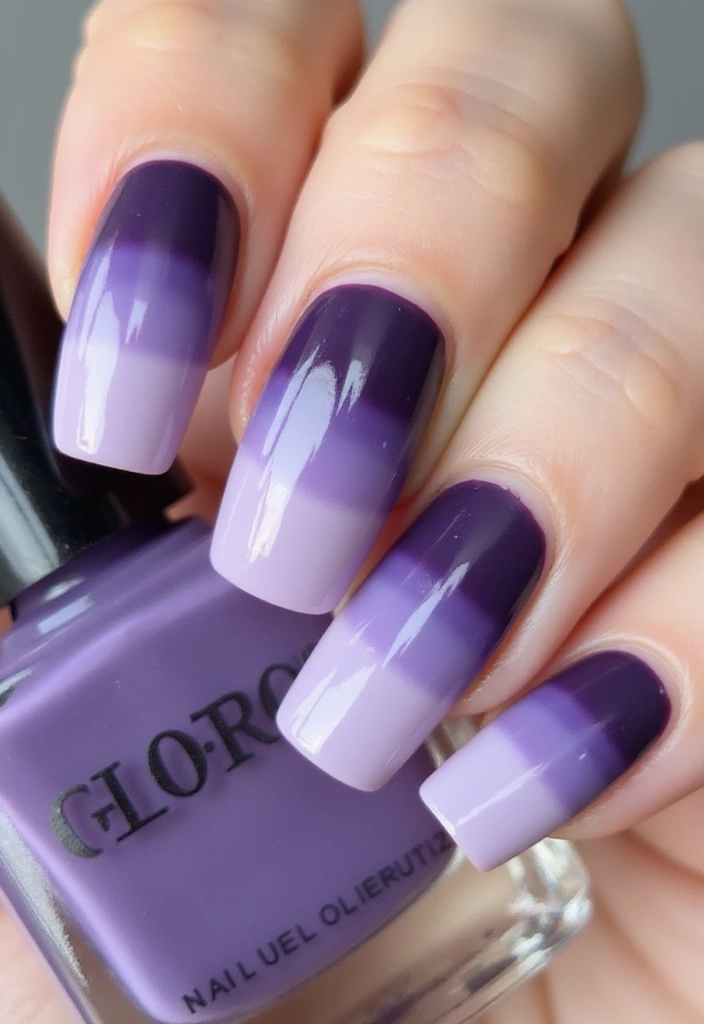
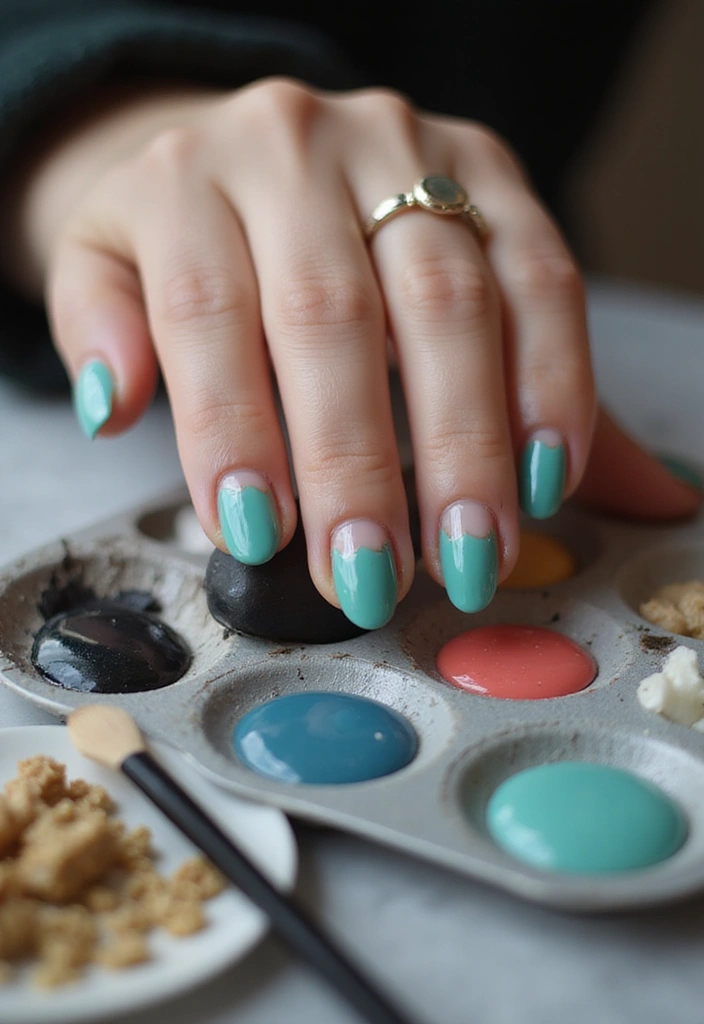
Ombre nails create a stunning gradient effect that can seamlessly blend two or more colors. This popular trend can be easily achieved at home with a makeup sponge and a few shades of your favorite polish. You can choose to go subtle with pastel tones or bold with vibrant hues.
Start by painting the base coat of your lighter color, letting it dry completely. Then, apply a line of the darker shade onto the sponge and dab it onto your nails, blending as you go. Finish it off with a top coat for a smooth finish.
Here are a few tips:
– Use a white base for a more vivid transition.
– Don’t be afraid to experiment with unconventional color combinations for a unique twist.
– Clean up any excess polish around your fingers with a small brush dipped in nail polish remover for a neat look.
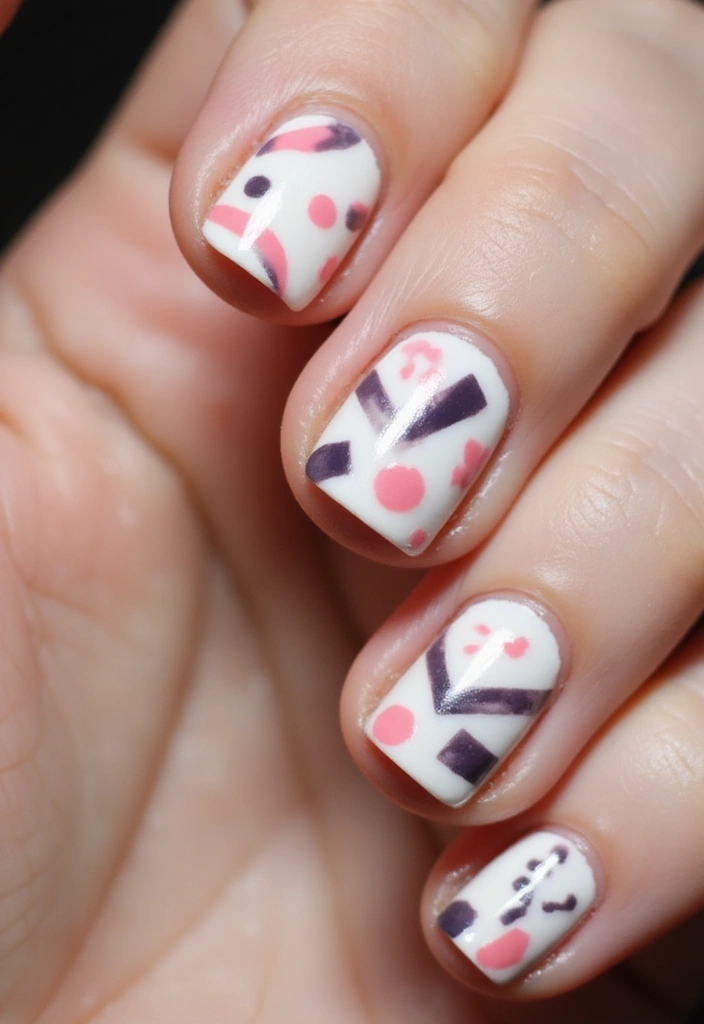
2. Geometric Patterns
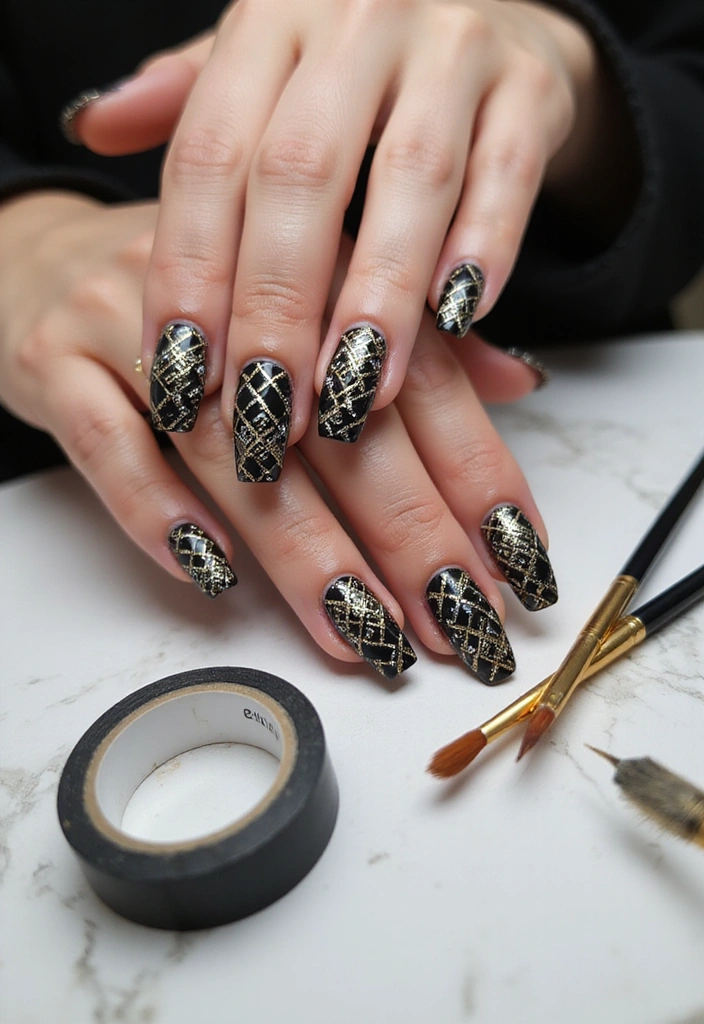
Geometric nail art is all about sharp lines and bold shapes. It’s a great way to add a modern twist to your look while keeping things sophisticated. You can use tape to create precise shapes or freehand it for more spontaneity.
After applying a base coat, choose two or three contrasting colors. Begin by painting a solid color for the background, then once it’s dry, use nail tape to section off areas for the additional colors. Apply different hues, peel off the tape, and voilà!
Here’s how to make it easier:
– Use thin nail striping tape for cleaner edges.
– For added dimension, try incorporating metallics or matte finishes.
– Don’t forget to seal it all with a glossy top coat to enhance the design and longevity.
3. Floral Fantasy
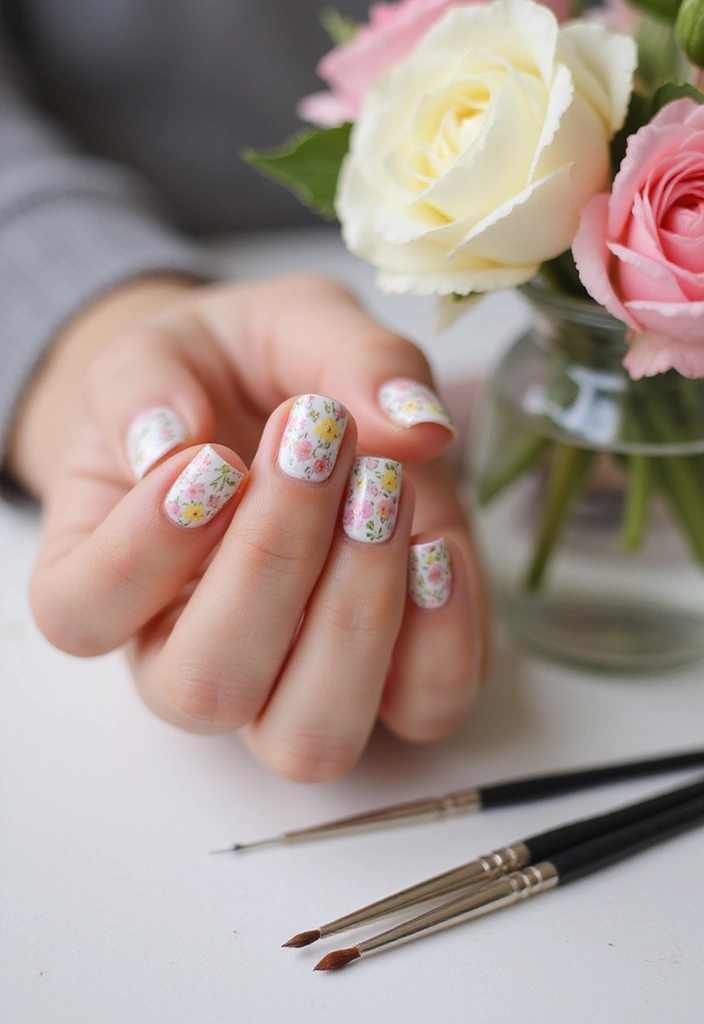
Floral designs bring a whimsical touch to any manicure, perfect for spring or summer vibes. You can paint tiny flowers on a solid background or create a full floral garden on each nail.
Begin by painting your nails a soft pastel color as a base. Once it’s dry, use a fine brush or dotting tool to create flower petals using your chosen colors. Add some green for leaves and little dots for accents.
To nail this design:
– Look for references online for flower shapes to mimic.
– Practice a few flowers on paper before applying to your nails.
– Always finish with a top coat to lock in the design and shine.
4. Classic French Twist
The classic French manicure gets a modern upgrade with a twist of colors and patterns. Instead of the traditional white tips, experiment with vibrant shades or even glitter!
To create this look, apply a nude polish as the base. Once dry, you can use tape or a steady hand to paint the tips in your chosen color. Consider using a metallic or neon hue for a trendy twist.
Some tips to keep in mind:
– For a fun take, add dots or stripes along the tip for extra detail.
– Experiment with different shapes for the tips, like a diagonal or bold curve.
– Finish with a high-gloss top coat for that salon-fresh look.
5. Glitter Gradient
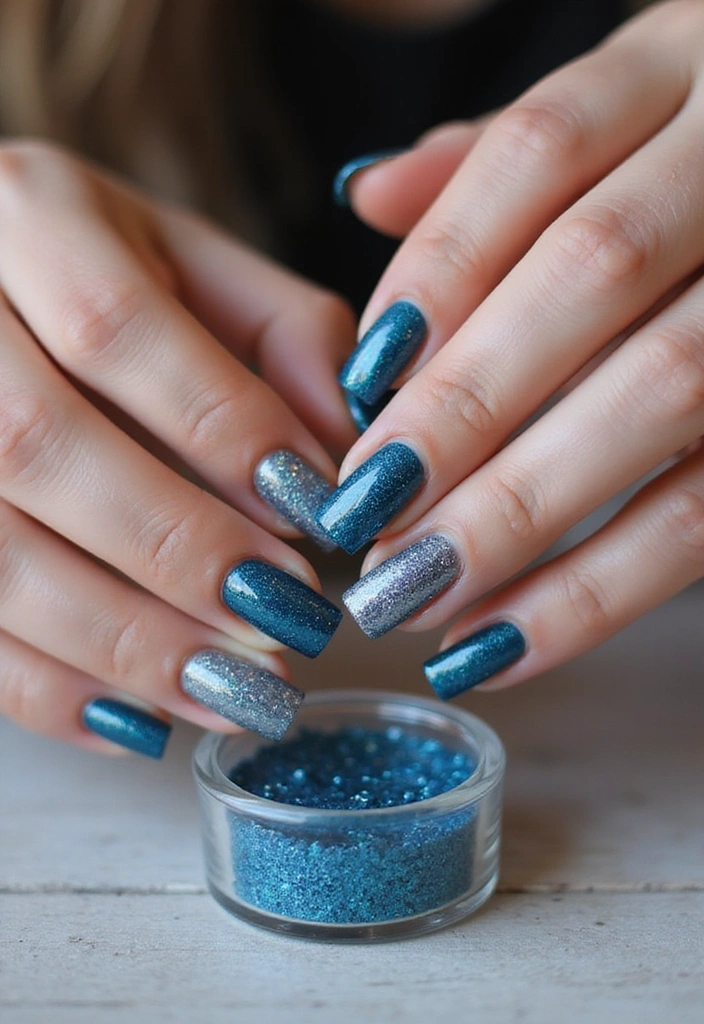
Who doesn’t love a bit of sparkle? Glitter gradient nails offer a fun way to add some glam to your nails, perfect for parties or nights out!
Start with a solid base color. Once dry, tap a glitter polish onto the tips and gradually drag it down to create a gradient effect. Alternatively, you can use a makeup sponge to apply the glitter for a softer blend.
Here are a few pointers:
– Choose a glitter that matches or complements your base color for a cohesive look.
– Remember to seal your design with a top coat to prevent glitter from falling off.
– Try layering different sizes of glitter for added texture.
6. Neon and Brights
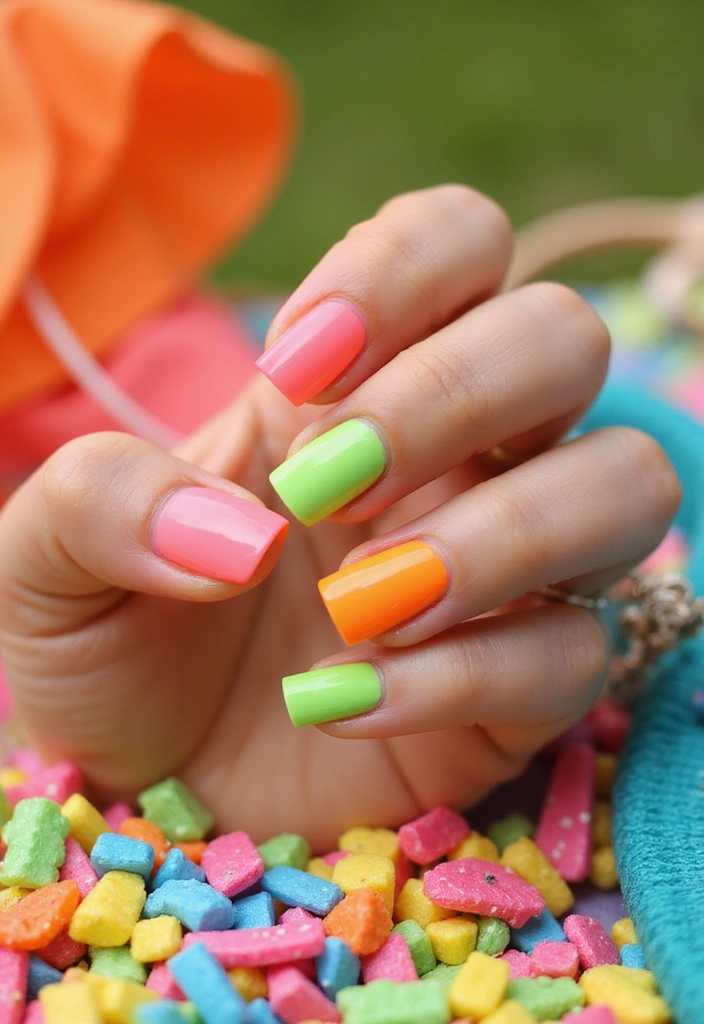
Neon nails are a bold choice that definitely makes a statement. Perfect for summer or festival vibes, they are sure to turn heads.
To achieve this look, select one or multiple neon shades. Apply a base coat first to enhance the brightness. Once everything is dry, you can either keep it simple with solid colors or mix in some designs like stripes or dots.
for bright nails:
– Use a white base coat before applying neon colors for maximum vibrancy.
– Consider matte top coats for a different finish that contrasts with the neon glow.
– Make sure to let each coat dry thoroughly to prevent smudging.
7. Marble Effect
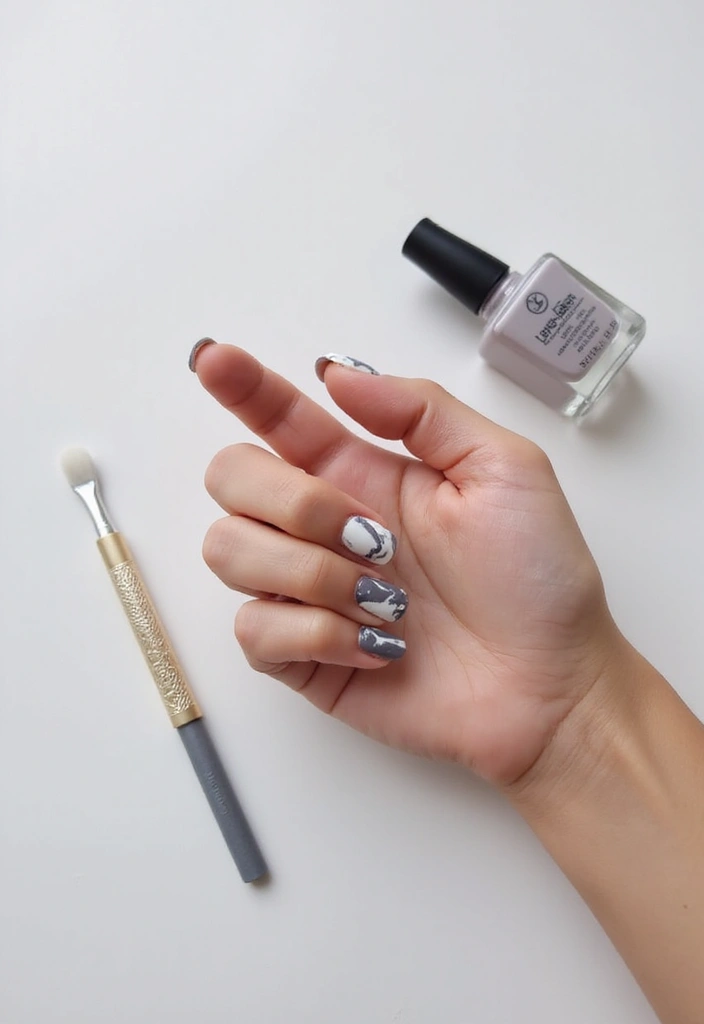
Marble nails exude an air of elegance and sophistication. Achieving this trendy look at home is easier than you might think!
Start with a white or light base color. Then, use a small brush or a striper to add veins of gray or black polish, swirling them gently for that marble effect. You can also use the ‘water marble’ technique, where you float colors on a water surface and dip your nails in.
Here are some tips:
– Practice your swirls on paper before applying to your nails.
– Seal the design with a matte or glossy top coat for a chic finish.
– Experiment with different color combos for unique effects.
8. Negative Space
Negative space designs are all about embracing the bare nail. This chic and modern trend uses the natural nail as part of the art, making it unique and easy to do!
To start, paint a base coat that complements your natural nail color. Then, use tape or a brush to create shapes, leaving parts of your nail exposed. You can combine this with other colors for added flair.
Keep these tips in mind:
– Use contrasting colors for a more dramatic look.
– Consider designs like stripes or geometric shapes for added interest.
– Finish with a clear top coat to give it a polished look.
9. Tie-Dye Vibes
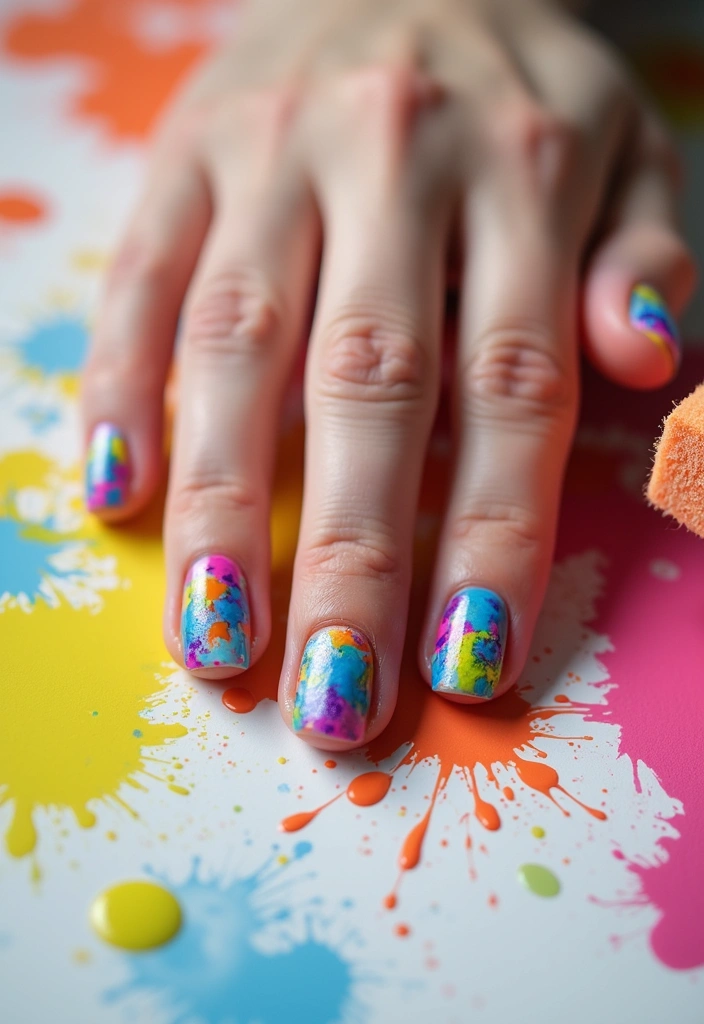
Bring back the colorful nostalgia of tie-dye with this playful nail art design. Perfect for summer festivals or casual outings, tie-dye nails are all about fun and creativity.
Start with a white base coat. Use a small brush to apply swirls of different colors, blending them together to create that signature tie-dye look. You can also use a sponge to dab the colors for a softer blend.
For the best results:
– Experiment with various color combinations for a unique effect.
– Use a clear top coat to lock in your design while adding shine.
– Try combining this with other techniques, like negative space or glitter accents.
10. Animal Print

Animal print is fierce and fabulous! From leopard spots to zebra stripes, these designs can add an edge to your manicure.
Begin with a neutral base coat. Once fully dried, use a fine brush or dotting tool to create your favorite animal print pattern. You can even mix prints on each nail for a wild look.
Here are some tips:
– Keep your designs small for a more sophisticated look.
– Try layering colors for added depth.
– Seal the look with a glossy top coat to give it that salon-finish.
11. Watercolor Nails
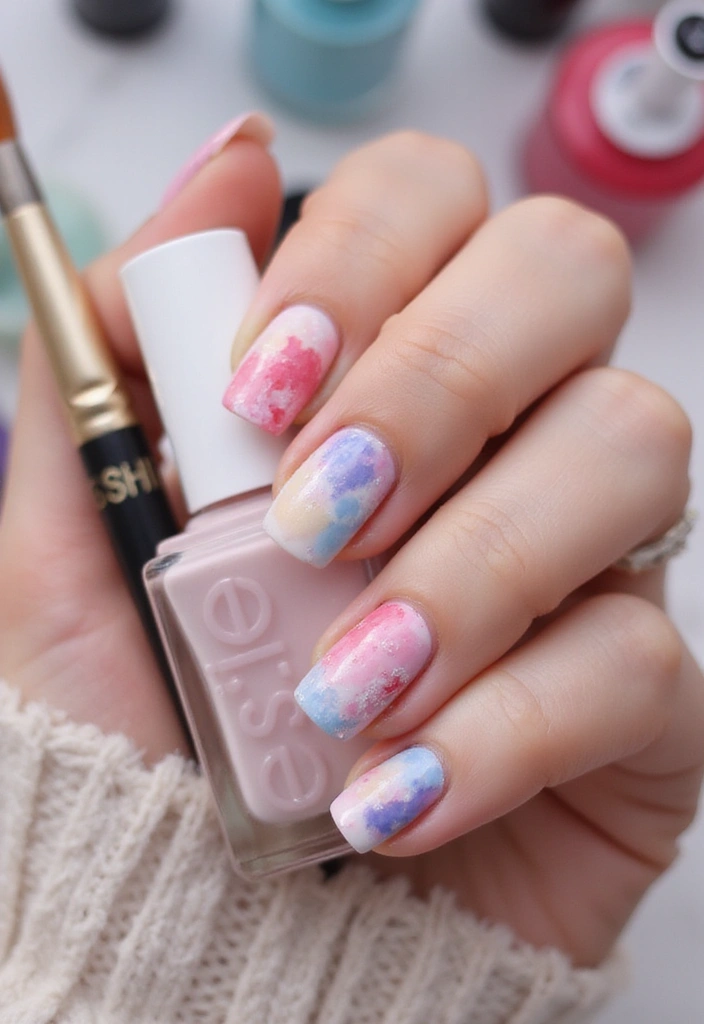
Watercolor nails deliver an artful, dreamy effect that looks soft and beautiful. This design is all about blending colors seamlessly together.
Start with a base coat to protect your nails. Using non-acetone polish remover, apply a couple of colors on a brush and blend them lightly onto your nails. The key is to work quickly while the polish is still wet.
for achieving this look:
– Use a large brush for a more painterly effect.
– Layer colors gradually to build intensity.
– Finish with a clear top coat for a smooth finish.
12. Dots and Dashes
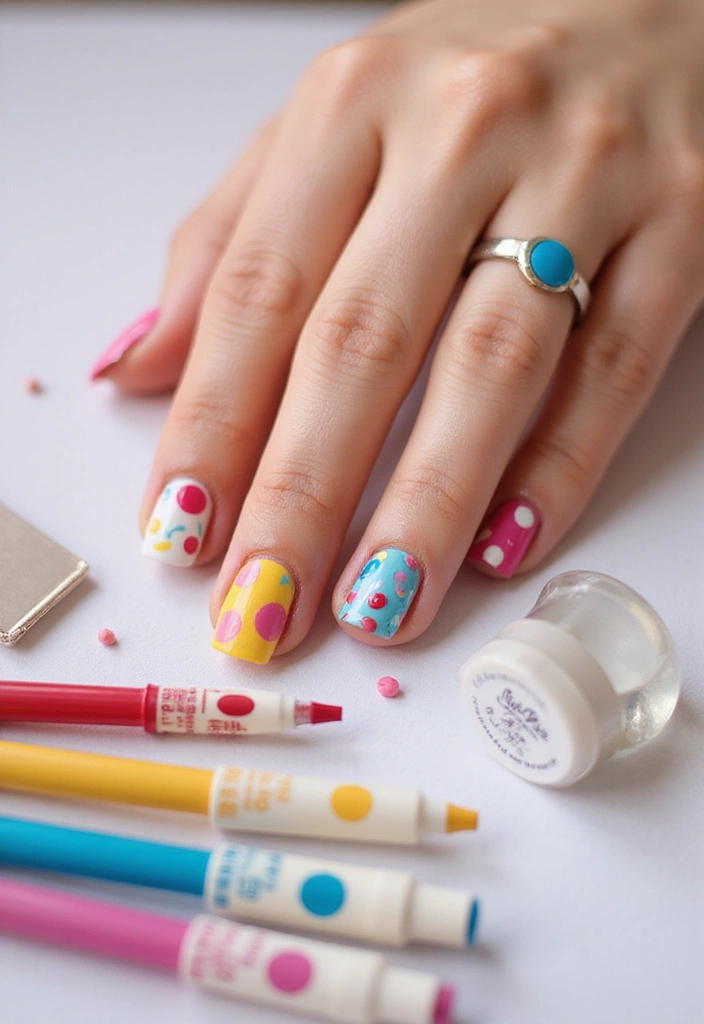
Simple yet striking, polka dots and lines can transform any basic nail into a fun masterpiece. They work well with practically any color base and can be customized to any occasion.
Start with a solid base coat. Once dry, use a dotting tool or the end of a bobby pin to create dots in different sizes. For dashes, a thin brush will work wonders.
Some great tips to get this right:
– Play around with color combinations for a fresh look.
– Use contrasting colors for dots and lines to make them pop.
– A matte top coat can give an interesting finish.
13. Seasonal Themes
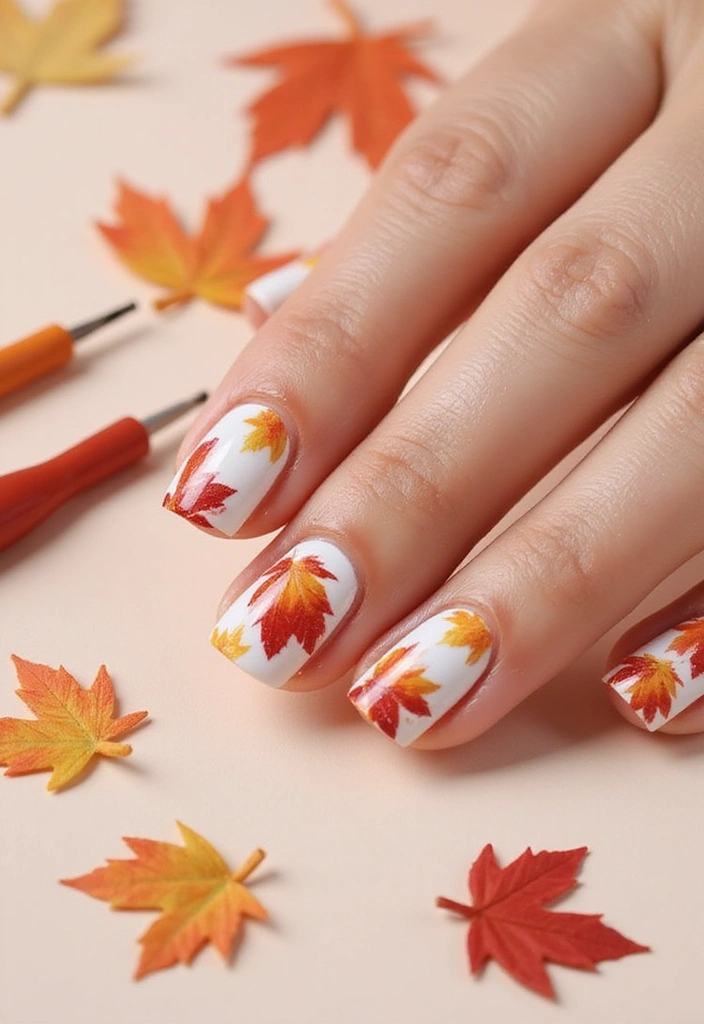
Tailoring your nails to the seasons can be super fun! Whether it’s fall leaves, winter snowflakes, or spring flowers, seasonal themes add a festive touch to your look.
Choose a base coat that represents the season. For example, warm tones for autumn, icy blues for winter, and bright pastels for spring. Use nail art tools to create seasonal designs.
Here’s how to make it a breeze:
– Look for inspiration online to mimic designs you like.
– When in doubt, stick to simple shapes that are easy to execute.
– Finish with a top coat that matches the festive theme.
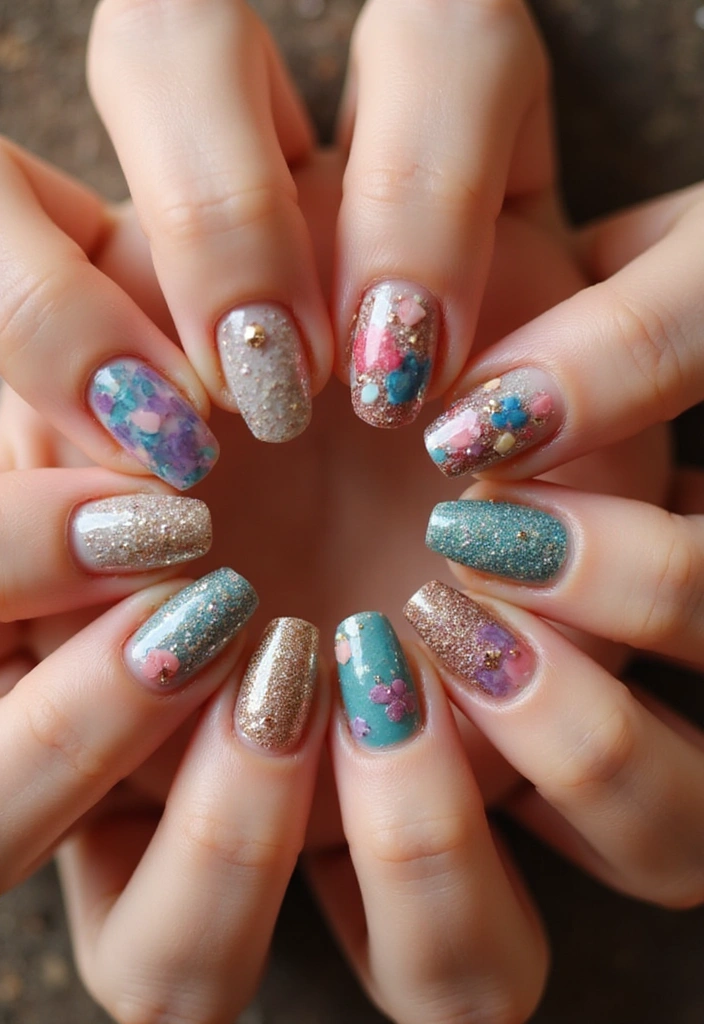
14. Textured Nail Art (Wait Until You See This!)
Textured nails are a trendy way to elevate your nail game. From sand to velvet, there are many ways to create unique textures that not only look amazing but also feel interesting!
Start with a base coat. Once dry, you can apply textured polishes or even sprinkle in some nail art supplies like beads or glitter while the polish is still wet. Experiment with different textures on each nail for an eclectic look.
A few tips to make it work:
– Try layering different textures for a stunning effect.
– Be mindful of the drying time; some textures will take longer to set.
– Always seal your design with a top coat to keep everything in place.
15. Foil Accent Nails
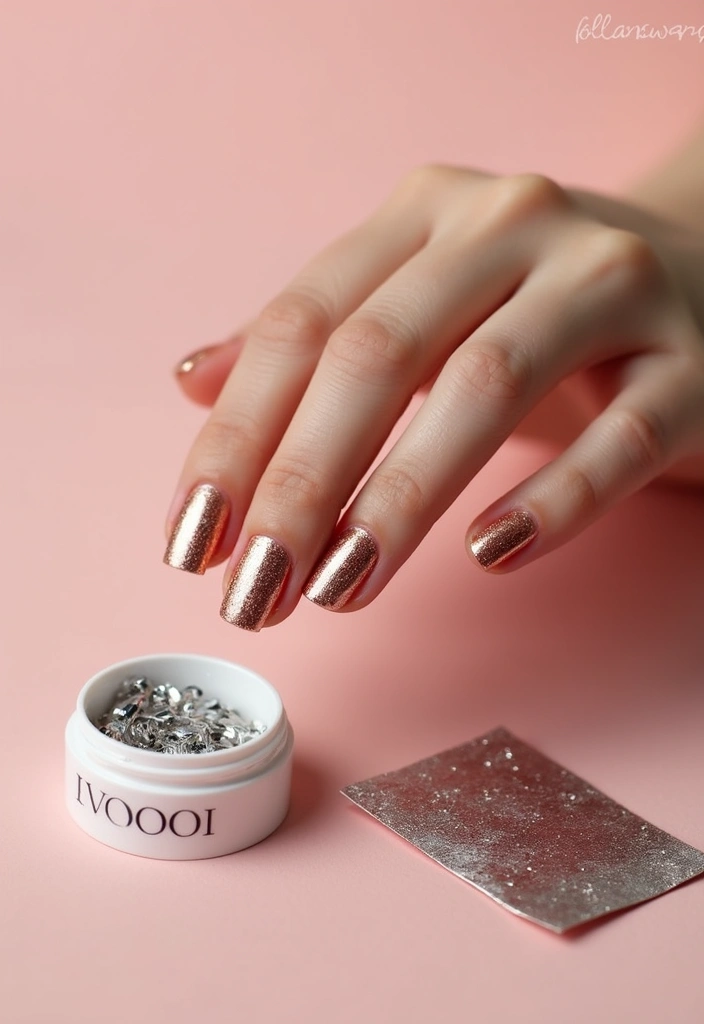
Foil nails are a stylish way to add chrome-like accents to one or two fingers without the commitment of full foil designs. They catch the light beautifully and can be paired with any manicure.
Start with a solid base coat. When your nails are completely dry, tear small pieces of foil and apply them onto wet polish using a brush or your fingers. For a fun look, try mixing different foil colors on one nail.
Here’s how to nail it:
– Use a light touch to avoid tearing the foil too much.
– Seal with a top coat for durability.
– This design looks great with minimalistic backgrounds for the best contrast.
16. Candy Stripes
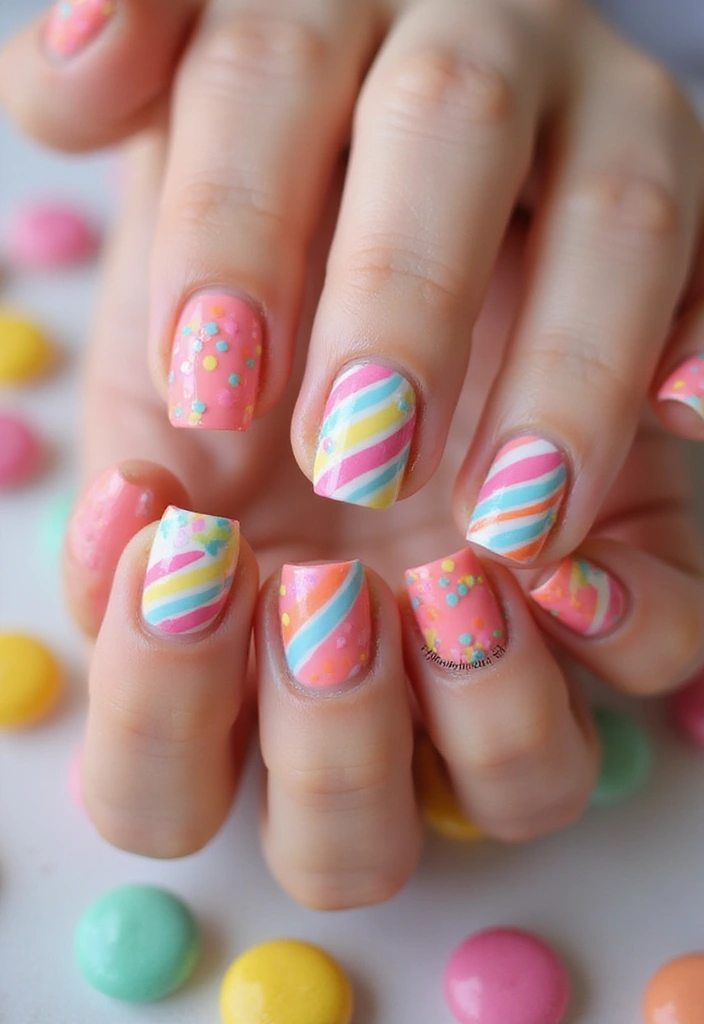
Candy striped nails are a playful and sweet design that’s perfect for any occasion! They can be done in a variety of colors and can add a touch of whimsy to your nails.
After applying your base coat, you can use nail striping tape to create crisp lines. Choose bright colors for a fun candy look or pastel shades for a softer approach.
Some tips to keep things sweet:
– Use a matte top coat for a unique finish that contrasts with the shiny stripes.
– Try mixing diagonal lines for a more dynamic look.
– Make sure to let each color dry before applying the next.
17. Simple Minimalism
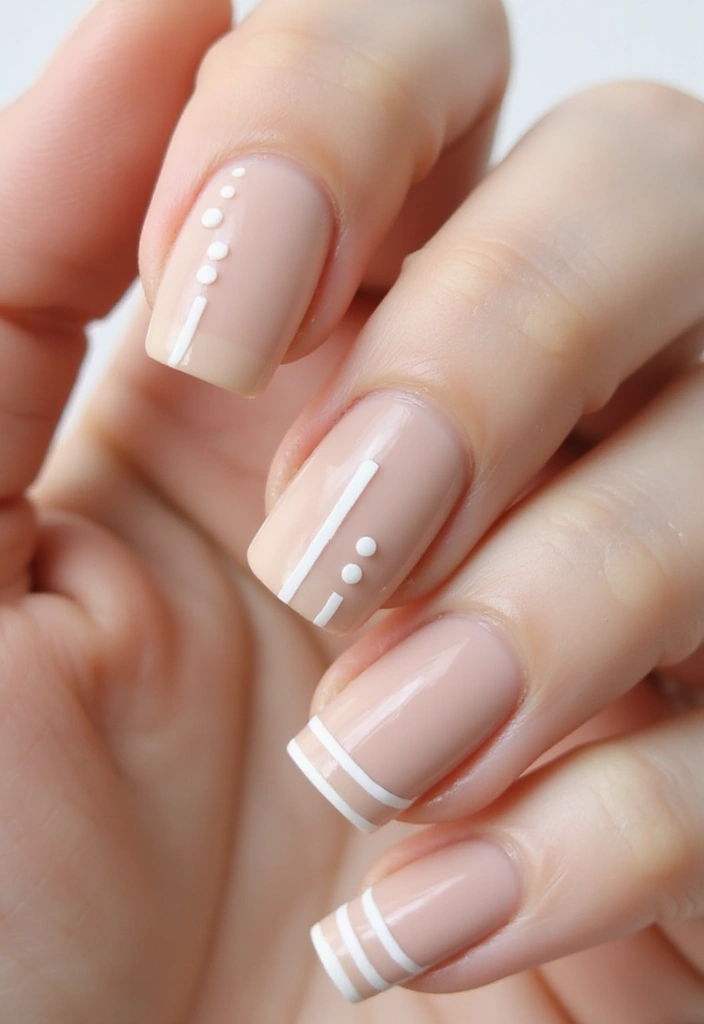
Less is more with minimalist nail art, which embraces simplicity and clean lines. This trend can be both chic and modern, making it suitable for any setting.
Using a nude or light-colored base, you can add simple shapes, lines, or dots with a fine brush. This can be done on just one or two nails, leaving the rest unadorned for a balanced look.
To achieve this trend:
– Stick to a limited color palette for that clean feel.
– Use a fine brush for precision.
– Remember that less detail can often make a stronger statement.
18. Vintage Glam
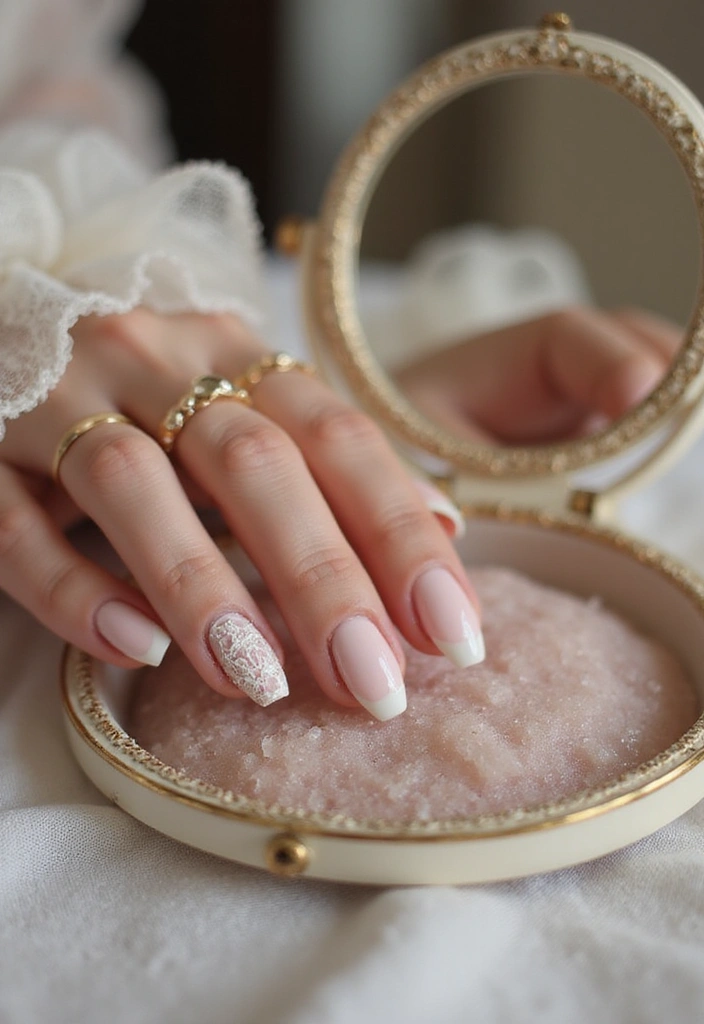
Vintage glam nails channel the classic elegance of bygone eras. Think of glamorous Hollywood or soft pastels—delicate yet eye-catching.
Begin with a light pastel base coat, and use a fine brush to create vintage patterns like lace or swirls on one or two accent nails. Gold or silver accents can add a touch of opulence.
Here’s how to master it:
– Use soft colors to create a vintage feel.
– Consider using decals for intricate designs that may be hard to paint freehand.
– Always finish with a glossy top coat for that polished vintage look.
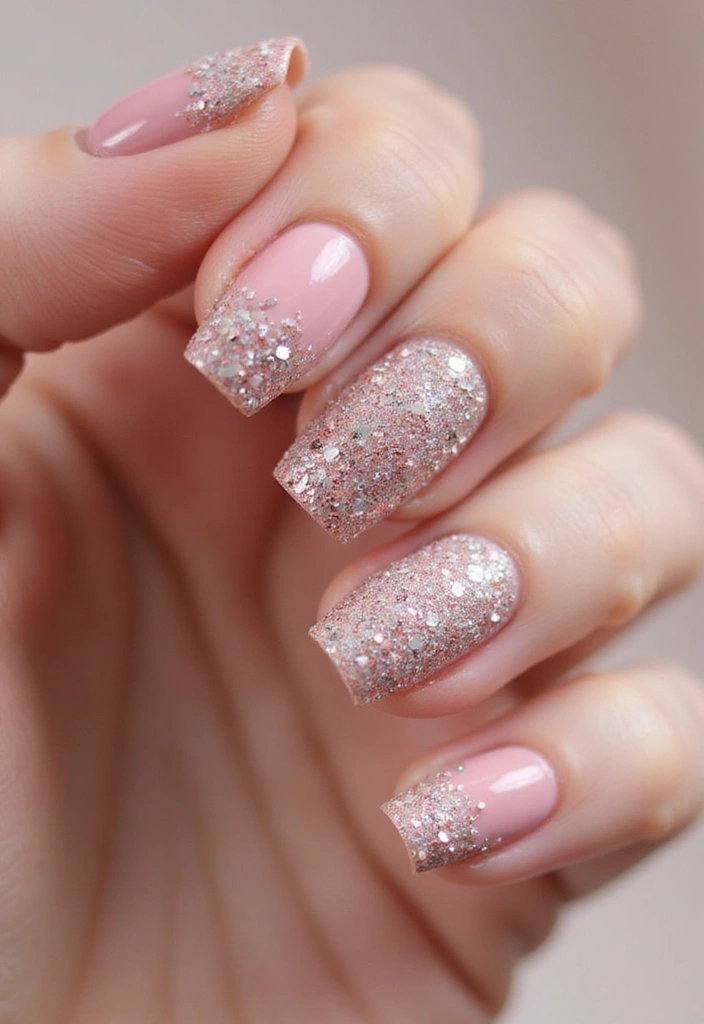
19. Gradient Glitter Tips

Combine the elegance of ombre with the glam of glitter for a stunning effect with gradient glitter tips. This design is perfect for special occasions when you want to catch the light just right!
Start with a solid base color and allow it to dry completely. Next, apply a coat of glitter polish at the tips and gradually drag it down towards the base. You can use a sponge for a more blended look.
For best results:
– Use a fine glitter for a more understated, sophisticated finish.
– Play with colors that contrast for more drama.
– Don’t forget to seal it all with a top coat to secure the glitter.
20. Bold Color Blocking
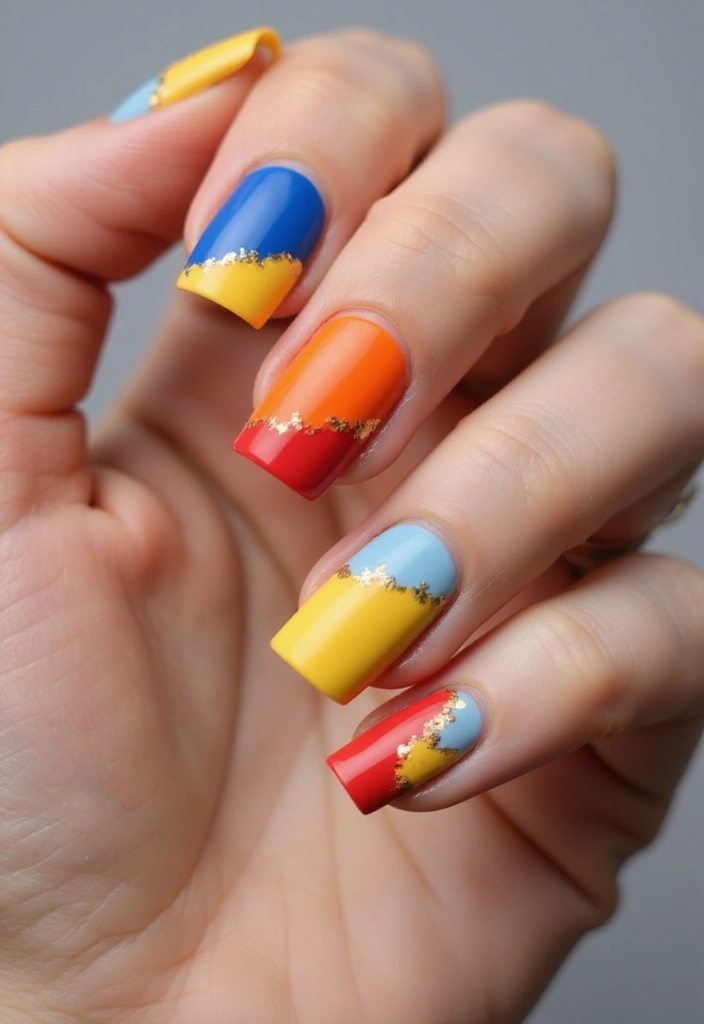
Color blocking is a fun way to combine different colors and patterns on each nail, allowing for a lot of creativity! With a little tape and a steady hand, you can master this playful trend.
Choose a few contrasting colors and use tape to create sections on your nails. Paint each section in a different color and remove the tape for a clean finish.
Some pointers for this design:
– Use contrasting colors to make each section pop.
– Consider adding patterns like stripes or dots in the blocked sections.
– A matte top coat can add an interesting finish if you’re looking for something different.
Finally
Nail art is a fantastic way to express yourself and showcase your creativity. With this list of trendy DIY designs, you’re guaranteed to find something that resonates with your style. Whether you opt for bold colors or delicate patterns, there’s no limit to what you can create at home.
So gather your nail art supplies, and let your imagination run wild. Have fun experimenting with these designs, and don’t forget to share your favorites with friends! Everyone loves a good DIY nail art session.